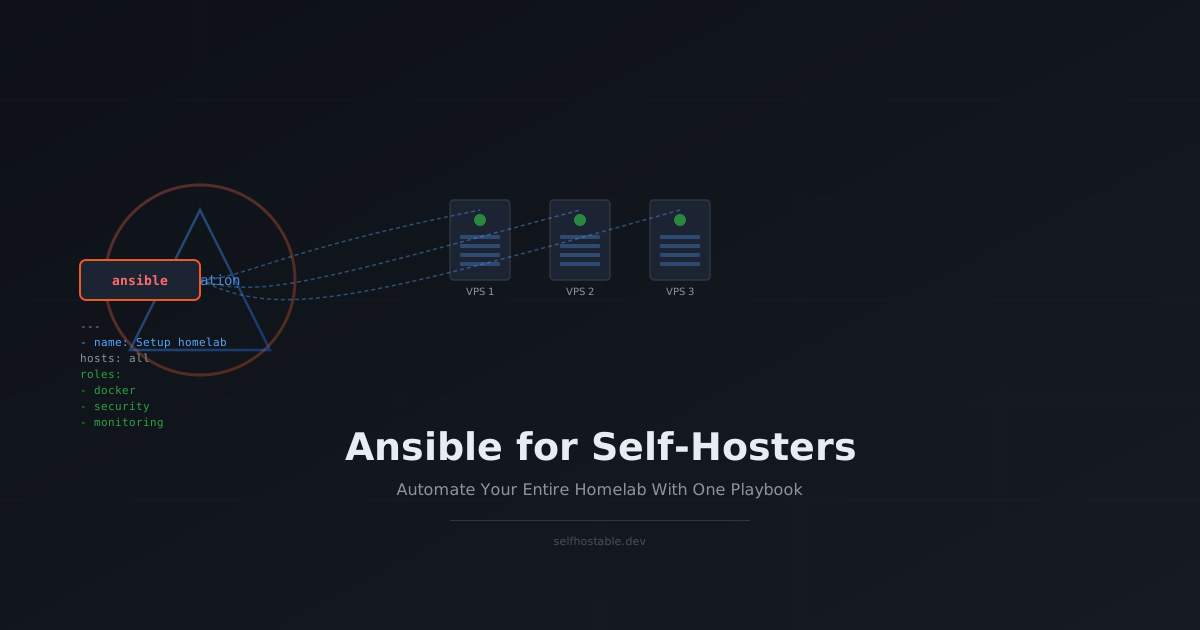
Ansible for Self-Hosters: Automate Your Entire Homelab
Stop SSH'ing into servers to run the same commands. Learn how to use Ansible to automate server setup, Docker deployments, and security hardening — all from one playbook.
I used to be the guy SSH’ing into five different servers to run the same commands. Install Docker. Set up UFW. Deploy a stack. Every. Single. Time.
Then I’d forget what I did on which server. Some had Docker installed, some didn’t. One server was running an old Ubuntu LTS, another had a different firewall config. Total chaos.
I knew I needed automation. But Kubernetes felt like overkill for a homelab. Bash scripts worked, but they got messy fast — no idempotency, no error handling, no structure.
Then I found Ansible. And honestly? It changed how I manage everything.
What Ansible Actually Is (and Isn’t)
Ansible is an automation tool from Red Hat. Unlike Puppet or Chef, it’s agentless — no software to install on your servers. It connects via SSH, runs your instructions, and disconnects. That’s it.
Here’s what it is NOT:
- Not a deployment tool (though you can deploy with it)
- Not a container orchestrator (Kubernetes, Nomad)
- Not a CI/CD pipeline (though Ansible + GitHub Actions is a great combo)
Ansible is configuration management. You describe what your servers should look like, and Ansible makes it happen. If a server already matches your description, Ansible does nothing — that’s idempotency, and it’s beautiful.
I manage 3 VPS instances, a Raspberry Pi, and a home server with a single Ansible repository. When I need to rebuild a server, it takes 15 minutes instead of 3 hours.
Why Self-Hosters Should Care
If you’re running more than one server, Ansible pays for itself fast.
The problem it solves: Every self-hoster starts with one server. You SSH in, run commands, set things up. Then you add a second server. Then a third. Pretty soon you’re copy-pasting the same 20 commands across different terminals, wondering if you missed something.
I’ve been there. I had a monitoring stack running on one VPS but not the other. My backup scripts existed on one server but the cron job wasn’t configured on the other. Every inconsistency was a ticking time bomb.
The Ansible way: You write a single playbook called site.yml that describes every server. Run it against all your machines. Every server ends up identical (or as identical as you want). When you add a new VPS, point Ansible at it, run the playbook, and boom — it’s fully configured.
The first time I ran ansible-playbook -i inventory site.yml and watched all three of my servers get configured simultaneously, I felt like I’d been wasting years of my life.
What You’ll Need
Before we get into the weeds:
- A control machine: This is where you run Ansible. Your laptop works, or a small VPS. Ansible runs on Linux/macOS. Windows works via WSL.
- Managed nodes: The servers you want to automate (can be multiple, or just one).
- SSH access: Ansible needs SSH access to your servers. Password-based works, but use SSH keys — it’s safer and Ansible won’t prompt you for passwords.
- Python 3: Your servers need Python 3 installed. Ubuntu comes with it. If you’re on a minimal distro,
apt install python3first.
I run Ansible from a cheap $4 Hetzner VPS that also hosts my Git repository. My laptop also has it for quick tests.
🚀NordVPN
Secure your Ansible control node and managed servers with a VPN. Keep your automation traffic private.
Affiliate link — we may earn a commission at no extra cost to you.
Installation: 30 Seconds
On your control machine (your laptop or a small VPS):
# Ubuntu/Debian
sudo apt update && sudo apt install ansible -y

# macOS
brew install ansible

# Verify
ansible --version
That’s it. No server agents, no databases, no web dashboard. Ansible is a CLI tool.
For a homelab, the default version from your package manager is fine. If you need the latest, use pip install ansible in a virtual environment.
Your First Ansible Command
Before writing playbooks, let’s confirm Ansible can talk to your servers.
Create a file called inventory.ini:
[homelab]
server1 ansible_host=192.168.1.10 ansible_user=root
server2 ansible_host=203.0.113.42 ansible_user=deploy

[homelab:vars]
ansible_python_interpreter=/usr/bin/python3
The [homelab] is a group. You can group servers by purpose: [webservers], [databases], [monitoring]. The [homelab:vars] section applies variables to every server in the group.
Now test connectivity:
ansible -i inventory.ini homelab -m pingIf everything works, you’ll see:
server1 | SUCCESS => {
    "changed": false,
    "ping": "pong"
}
server2 | SUCCESS => {
    "changed": false,
    "ping": "pong"
}
Ansible connected to both servers via SSH and ran the ping module. No agents, no certificates, just SSH.
Gotcha I hit: If you get “Permission denied”, make sure your SSH key is added to the server’s authorized_keys. Use ssh-copy-id user@server to set it up.
The Anatomy of a Playbook
A playbook is just a YAML file. Here’s a simple one that installs Docker on all your servers:
---
- name: Setup Docker on homelab servers
  hosts: homelab
  become: yes
  tasks:
    - name: Install required system packages
      ansible.builtin.apt:
        name:
          - apt-transport-https
          - ca-certificates
          - curl
          - gnupg
          - lsb-release
        state: present
        update_cache: true

    - name: Add Docker official GPG key
      ansible.builtin.apt_key:
        url: https://download.docker.com/linux/ubuntu/gpg
        state: present

    - name: Add Docker repository
      ansible.builtin.apt_repository:
        repo: "deb [arch=amd64] https://download.docker.com/linux/ubuntu {{ ansible_distribution_release }} stable"
        state: present

    - name: Install Docker
      ansible.builtin.apt:
        name:
          - docker-ce
          - docker-ce-cli
          - containerd.io
          - docker-compose-plugin
        state: present

    - name: Ensure Docker is running
      ansible.builtin.systemd:
        name: docker
        state: started
        enabled: yes

    - name: Add user to docker group
      ansible.builtin.user:
        name: "{{ ansible_user }}"
        groups: docker
        append: yes
Save this as docker.yml and run:
ansible-playbook -i inventory.ini docker.ymlAnsible runs every task on every server in the homelab group. If Docker is already installed, nothing changes. That’s idempotency in action.
My Real Homelab Playbook Structure
A single flat playbook works for small setups, but once you have more than a few servers, you’ll want structure. Here’s my actual Ansible directory layout:
ansible-homelab/
├── inventory.ini           # Server inventory
├── site.yml                # Master playbook
├── requirements.yml        # External roles (optional)
├── group_vars/
│   └── homelab.yml         # Variables for homelab group
└── roles/
    ├── base/               # Common to all servers
    │   ├── tasks/main.yml
    │   └── vars/main.yml
    ├── docker/             # Docker setup
    │   └── tasks/main.yml
    ├── security/           # UFW, fail2ban, SSH hardening
    │   ├── tasks/main.yml
    │   └── handlers/main.yml
    └── monitoring/         # Deploy Uptime Kuma, Beszel
        └── tasks/main.yml
The master playbook (site.yml) ties everything together:
---
- name: Apply base configuration to all servers
  hosts: all
  become: yes
  roles:
    - base
    - security

- name: Setup Docker on homelab servers
  hosts: homelab
  become: yes
  roles:
    - docker

- name: Deploy monitoring stack
  hosts: monitoring-servers
  become: yes
  roles:
    - monitoring
Run the whole thing with:
ansible-playbook -i inventory.ini site.ymlI keep this in a private GitHub repo. When I add a new server, I add it to inventory.ini, run ansible-playbook -i inventory.ini site.yml, and walk away. 15 minutes later, the server is fully configured.
Security Hardening with Ansible
This is where Ansible really shines for self-hosters. Instead of manually running the security steps from my VPS hardening guide on every server, I automate it.
Here’s my roles/security/tasks/main.yml:
---
- name: Update all packages
  ansible.builtin.apt:
    upgrade: dist
    update_cache: yes
    cache_valid_time: 3600

- name: Install Fail2ban
  ansible.builtin.apt:
    name: fail2ban
    state: present

- name: Configure UFW defaults
  ansible.builtin.ufw:
    direction: "{{ item.direction }}"
    policy: "{{ item.policy }}"
  loop:
    - { direction: "incoming", policy: "deny" }
    - { direction: "outgoing", policy: "allow" }

- name: Allow SSH
  ansible.builtin.ufw:
    rule: allow
    port: "22"
    proto: tcp

- name: Allow HTTP and HTTPS
  ansible.builtin.ufw:
    rule: allow
    port: "{{ item }}"
    proto: tcp
  loop:
    - "80"
    - "443"

- name: Enable UFW
  ansible.builtin.ufw:
    state: enabled

- name: Harden SSH config
  ansible.builtin.lineinfile:
    path: /etc/ssh/sshd_config
    regexp: "{{ item.regexp }}"
    line: "{{ item.line }}"
    state: present
  loop:
    - { regexp: "^PermitRootLogin", line: "PermitRootLogin prohibit-password" }
    - { regexp: "^PasswordAuthentication", line: "PasswordAuthentication no" }
    - { regexp: "^PubkeyAuthentication", line: "PubkeyAuthentication yes" }
  notify: restart sshd

- name: Setup automatic security updates
  ansible.builtin.apt:
    name: unattended-upgrades
    state: present

- name: Configure unattended-upgrades
  ansible.builtin.template:
    src: 50unattended-upgrades.j2
    dest: /etc/apt/apt.conf.d/50unattended-upgrades
    owner: root
    group: root
    mode: "0644"
The handlers/main.yml:
---
- name: restart sshd
  ansible.builtin.systemd:
    name: sshd
    state: restarted
I run this against every new server before deploying anything. It takes 30 seconds instead of 30 minutes.
Deploying Docker Compose Stacks with Ansible
This is the killer feature for me. Instead of SSH’ing into a server to run docker compose up -d, I let Ansible deploy and update my stacks.
Here’s a task that deploys a monitoring stack:
- name: Create monitoring directory
  ansible.builtin.file:
    path: /opt/monitoring
    state: directory
    owner: root
    group: root
    mode: "0755"

- name: Copy docker-compose.yml
  ansible.builtin.template:
    src: monitoring/docker-compose.yml.j2
    dest: /opt/monitoring/docker-compose.yml
    owner: root
    group: root
    mode: "0644"

- name: Deploy monitoring stack
  community.docker.docker_compose_v2:
    project_src: /opt/monitoring
    state: present
    pull: always
  register: output

- name: Show deployment output
  ansible.builtin.debug:
    var: output.stdout
The docker-compose.yml.j2 template uses Jinja2 templating:
version: "3.8"

services:
  uptime-kuma:
    image: louislam/uptime-kuma:1
    container_name: uptime-kuma
    volumes:
      - ./uptime-data:/app/data
    ports:
      - "{{ monitoring_ports.uptime_kuma }}:3001"
    restart: unless-stopped
    labels:
      - "com.centurylinklabs.watchtower.enable=true"

  beszel:
    image: henrygd/beszel:latest
    container_name: beszel
    volumes:
      - ./beszel-data:/data
    ports:
      - "{{ monitoring_ports.beszel }}:8090"
    restart: unless-stopped
Variables like {{ monitoring_ports.uptime_kuma }} come from group_vars/homelab.yml:
---
monitoring_ports:
  uptime_kuma: 3001
  beszel: 8090
This keeps configs in one place. Change the port in group_vars, run the playbook, everything updates.
Variables: Don’t Hardcode Anything
Variables make your playbooks reusable across different servers. Instead of hardcoding an IP address or port, use a variable.
Variable priority (lowest to highest):
group_vars/all.yml— applies to every servergroup_vars/groupname.yml— applies to a grouphost_vars/hostname.yml— applies to a specific server- Playbook
vars:section - Command line
-e "var=value"— overrides everything
I use this pattern extensively. Most variables go in group_vars/homelab.yml. Host-specific stuff (IPs, hostnames) goes in host_vars/.
Example host_vars/server1.yml:
---
hostname: media-server
public_services:
  - jellyfin
  - immich
  - vaultwarden
backup_enabled: true
backup_dest: "/mnt/backups"
Then in my playbook, I can conditionally enable backups only on certain servers:
- name: Configure backups
  hosts: all
  become: yes
  tasks:
    - name: Setup backup cron job
      ansible.builtin.cron:
        name: daily backup
        hour: "3"
        minute: "0"
        job: "/usr/local/bin/backup.sh"
      when: backup_enabled is defined and backup_enabled
Ansible evaluates when: on each host. If server2 doesn’t have backup_enabled: true, that task is skipped.
What I Learned the Hard Way
I’ve been running Ansible for about a year. Here’s what bit me.
1. Test on one server first
I ran a playbook against all three of my servers without testing. Turns out the ufw module on one server was an older version that didn’t support the direction parameter. I locked myself out of a production server at 11pm.
Now I always test with --limit server1 first:
ansible-playbook -i inventory.ini site.yml --limit server1 --checkThe --check flag does a dry run — it shows what would change without actually making changes.
2. Use ansible-vault for secrets
I had my Cloudflare API token and database passwords in plain text in my playbook. For a while. Then I woke up one morning and realized my Ansible repo was in a private GitHub repo, but still — if someone compromised my GitHub account, they’d have every secret in my infrastructure.
Ansible Vault encrypts sensitive variables:
ansible-vault encrypt group_vars/homelab.ymlNow you need a password to read or run the playbook:
ansible-playbook -i inventory.ini site.yml --ask-vault-passStore the vault password in a password manager or use --vault-password-file with a script.
3. Idempotency isn’t automatic
Ansible modules are supposed to be idempotent, but your custom command or shell tasks aren’t. I had a shell task that ran docker system prune -f every time — even when there was nothing to prune. It worked, but it was wasteful.
If you must use shell or command, use creates or when to make them idempotent:
- name: Prune Docker system
  ansible.builtin.shell: docker system prune -f --volumes
  when: docker_prune_enabled | default(false)
4. Tags are your friend
Running the entire playbook when you just want to update Docker is slow. Use tags:
- name: Install Docker
  ansible.builtin.apt:
    name: docker-ce
    state: present
  tags:
    - docker
    - packages
Then:
# Just run Docker-related tasks
ansible-playbook -i inventory.ini site.yml --tags docker

# Skip security tasks
ansible-playbook -i inventory.ini site.yml --skip-tags security
5. Ansible Galaxy saves time
Before writing a role from scratch, check Ansible Galaxy. Someone else probably already wrote the Docker installation role, or the Fail2ban config role.
ansible-galaxy install geerlingguy.dockerThen add it to your playbook:
- name: Setup Docker
  hosts: homelab
  become: yes
  roles:
    - geerlingguy.docker
I use Galaxy roles for common tasks (Docker, Nginx, Node.js) and write custom roles for my specific stack.
A Complete Example: Provisioning a New VPS
Here’s my actual workflow when I spin up a new $4 Hetzner VPS:
1. Add the server to inventory.ini:
[homelab]
new-vps ansible_host=116.203.xx.xx ansible_user=root
2. Update host variables:
Create host_vars/new-vps.yml:
---
hostname: new-vps
backup_enabled: false
deploy_services:
  - nginx
  - uptime-kuma
3. Run the playbook with limit:
ansible-playbook -i inventory.ini site.yml --limit new-vpsAnsible connects to the fresh server, updates packages, installs Docker, sets up UFW, configures SSH hardening, deploys Uptime Kuma, and optionally deploys a reverse proxy.
15 minutes. One command. Perfectly reproducible.
When I need to rebuild that server (it happens), I just re-run the playbook. Same result every time.
Ansible vs Other Automation Tools
People ask me: “Why Ansible instead of just using Docker Compose everywhere?”
Docker Compose is great for deploying a single service or stack. But it doesn’t configure the host OS — it doesn’t install Docker itself, doesn’t configure the firewall, doesn’t set up SSH keys or automatic updates.
Bash scripts work, but they’re not idempotent. Run a bash script twice and things might break. Run an Ansible playbook twice and nothing changes (assuming it’s well-written).
Terraform is for provisioning infrastructure (VPS instances, DNS records, cloud resources). Terraform + Ansible is a powerful combo — Terraform creates the server, Ansible configures it.
Kubernetes is overkill for most homelabs. Ansible gives you the automation without the complexity.
For a self-hoster running 1-10 servers, Ansible is the sweet spot.
What’s Next
You’ve seen the basics. Here’s where to go from here:
- Create a repo — Start a private GitHub repo for your Ansible configs
- Write your first playbook — Start with one server and one task (install Docker)
- Add security — Automate UFW, fail2ban, SSH hardening
- Deploy your stacks — Use templates to manage Docker Compose across servers
- Add a new server — Actually spin up a fresh VPS and run your playbook against it. The feeling is addictive.
I keep my Ansible repo updated alongside my actual servers. When I discover a new security setting or a better config, I update the playbook and re-run it. All my servers stay consistent without manual effort.
The real win: When my next VPS bill comes due, I can tear down the oldest server, spin up a new one, and migrate everything with a single playbook run. No manual setup, no forgotten configs, no “wait, did I set up backups on that one?” panic.
If you’re managing more than one server and still SSH’ing into each one individually, you’re working too hard. Ansible turns a dozen manual tasks into one automated command. It’s the closest thing to a homelab superpower I’ve found.
Written on 2026-08-17, running Ansible from a $4 Hetzner VPS that manages 3 other servers. My playbook has 247 lines and growing.
Stay in the loop 📬
Get self-hosting tutorials, tool reviews, and infrastructure tips delivered to your inbox. No spam, unsubscribe anytime.
Join 0 self-hosters. Free forever.