Self-Host Headscale: Run Your Own Tailscale Control Server
Tailscale is amazing, but it relies on their cloud coordination server. Headscale lets you own that piece too. Here's how I run my own mesh VPN.
The One Thing That Bugged Me About Tailscale
I love Tailscale. It’s the best thing that happened to self-hosted networking since WireGuard itself. Zero config, NAT traversal that actually works, and it turns my scattered VPS boxes into one cozy little LAN.
But there’s one thing that always scratched the back of my mind: the coordination server.
Every time my machines talk to each other, they check in with Tailscale’s cloud. Who’s online? What’s their IP? Here’s the encryption key. It’s all handled transparently, but it means every device in my tailnet must reach control.tailscale.com to work.
What happens if Tailscale goes down? What if they change their pricing? What if I want to run this for a client who doesn’t want their network metadata touching US servers?
That’s where Headscale comes in.
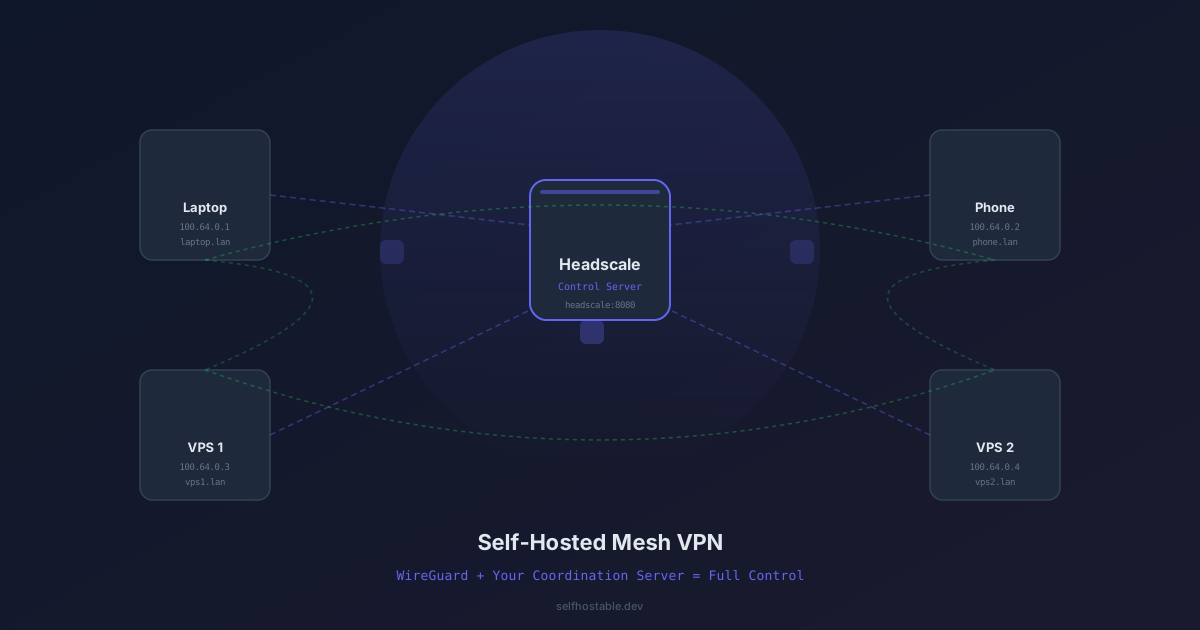
Headscale is an open-source implementation of the Tailscale control server. Same protocol, same WireGuard magic underneath — but you run the coordination layer. Your devices check in with your server, not Tailscale’s.
I’ve been running it for six months. It’s been rock solid. Here’s everything I learned.
What Headscale Actually Does
Let’s get the terminology straight.
Tailscale is two things:
- The client (tailscaled daemon running on your machines)
- The control server (tailscale.com — the coordination layer)
The client generates WireGuard keys, negotiates NAT traversal, and sets up peer-to-peer connections. But it needs a coordination server to know who to connect to and how.
Headscale replaces that coordination server. Your clients still use the official Tailscale client — no fork, no custom build — they just point to your Headscale instance instead of tailscale.com.
The result: same mesh VPN, same ease of use, same WireGuard performance. But now the control plane lives on your hardware.
Why Bother?
I asked myself the same question when I first heard about Headscale. Tailscale is free for personal use (up to 3 users, 100 devices). Why add complexity?
Three reasons convinced me:
1. Offline resilience. If my internet goes down but my LAN is still up, devices on my home network can still communicate via Tailscale — because they already have the WireGuard keys cached. But new devices can’t join, and if the cache expires… you’re stuck. With Headscale, the coordination server is on my LAN. Everything keeps working.
2. No vendor lock-in. Tailscale is built on amazing tech, but it’s a VC-backed startup. Pricing changes, acquisition, or service changes are all possible. I’ve been burned by “free tiers” before (looking at you, Google Photos). Headscale means my mesh VPN survives any Tailscale corporate decision.
3. Data sovereignty. Your tailnet metadata — which devices are connected, their IPs, their names, their ACLs — lives on Tailscale’s servers by default. For homelab use, that’s fine. For a business, that’s a compliance nightmare. Headscale fixes that.
The trade-off? You need to maintain the Headscale server. Updates, backups, availability. It’s not hard, but it’s your problem now.
🚀NordVPN
Secure your server with a reliable VPN.
Affiliate link — we may earn a commission at no extra cost to you.
What You’ll Need
Headscale is lightweight. Here’s what I’m running it on:
- A VPS or home server with Docker. I use a $6/month Hetzner CX22 (2 vCPU, 4GB RAM). Headscale uses ~100MB RAM and negligible CPU.
- A domain name (or a subdomain). You’ll need DNS for the Headscale endpoint.
- Open ports: TCP 443 (HTTPS) and optionally UDP 3478 (STUN for NAT traversal).
- Basic Linux + Docker skills. If you’ve deployed anything on this blog, you’re qualified.
The domain requirement is the real gotcha. Headscale needs a valid SSL certificate (we’ll use Let’s Encrypt), and that requires a domain. You can technically use the IP directly, but clients will throw certificate warnings and mobile apps may refuse to connect.
Installation with Docker Compose
Let’s set it up. I’m using a reverse proxy (Traefik) for SSL, but I’ll also show you the standalone approach with Caddy — it’s simpler for most people.
Directory Structure
mkdir -p ~/headscale && cd ~/headscaleDocker Compose (with Caddy for SSL)
This is the simplest setup. Caddy automatically handles Let’s Encrypt certificates.
# docker-compose.yml
services:
  headscale:
    image: headscale/headscale:latest
    container_name: headscale
    restart: unless-stopped
    command: headscale serve
    volumes:
      - ./config:/etc/headscale
      - ./data:/var/lib/headscale
    environment:
      - TZ=Europe/Paris
    ports:
      - "127.0.0.1:8080:8080"
    networks:
      - headscale-net

  caddy:
    image: caddy:latest
    container_name: caddy-headscale
    restart: unless-stopped
    ports:
      - "80:80"
      - "443:443"
    volumes:
      - ./Caddyfile:/etc/caddy/Caddyfile
      - caddy_data:/data
    networks:
      - headscale-net
    depends_on:
      - headscale

networks:
  headscale-net:
    driver: bridge

volumes:
  caddy_data:
Caddyfile
The Caddyfile is refreshingly simple:
headscale.yourdomain.com {
    reverse_proxy headscale:8080
}
Replace headscale.yourdomain.com with your actual domain. Caddy will get the SSL cert automatically on first request.
Headscale Configuration
mkdir -p configGenerate a base config:
docker run --rm headscale/headscale:latest headscale config > config/config.yamlOr create it manually. Here’s a stripped-down version with the critical fields:
# config/config.yaml
server_url: https://headscale.yourdomain.com
listen_addr: 0.0.0.0:8080

# This is the "magic" that makes it work like Tailscale
dns:
  # Enable MagicDNS — your devices get .yourdomain.com names
  magic_dns: true
  base_domain: yourdomain.com

# Randomize client ports for NAT traversal
randomize_client_port: true

# ACLs: who can talk to whom
acls:
  - action: accept
    src: ["*"]
    dst: ["*:*"]
Critical fields:
server_url: Must be the public HTTPS URL. Clients connect here.base_domain: Used for MagicDNS. If set toyourdomain.com, your devices get names likemy-laptop.yourdomain.com.acls: The default above allows all-to-all communication. You can restrict it later.
Start It
docker compose up -dCheck the logs:
docker logs headscaleYou should see “Headscale is listening on :8080”. The Caddy container will also log “certificate obtained successfully” after a few seconds.
Creating Users and Enrolling Devices
Headscale uses a user/namespace system. Each user gets their own set of devices.
Create a User
docker exec headscale headscale users create homelabI use homelab as my namespace. You could use your name, your organization, whatever.
Pre-Auth Key (The Easy Way)
Instead of the tailscale login flow (which redirects to tailscale.com by default), you use pre-authentication keys with Headscale.
docker exec headscale headscale preauthkeys create --user homelab --expiration 24h --reusableThis outputs a key like 1234abc.... Copy it.
Connect a Device
On any machine you want to join to your tailnet:
# Linux/macOS
sudo tailscale up --login-server=https://headscale.yourdomain.com --authkey=KEY_FROM_ABOVE

# Windows (PowerShell)
tailscale up --login-server=https://headscale.yourdomain.com --authkey=KEY_FROM_ABOVE
That’s it. Your device is now part of your private mesh network. You can verify:
tailscale statusYou’ll see all your connected devices with their Tailscale IPs (typically 100.x.x.x range).
Pro tip: The first device you enroll becomes the “admin.” Make sure it’s a machine you control. And keep the auth keys temporary — I use 24h expiry and generate new ones when needed.
MagicDNS: Access Devices by Hostname
This is my favorite feature. With MagicDNS, you can ping my-laptop.yourdomain.com instead of remembering IPs.
Enable it in your Headscale config (we already did):
dns:
  magic_dns: true
  base_domain: yourdomain.com
On each client, you also need to accept the Tailscale DNS configuration:
sudo tailscale up --accept-dnsNow ping my-laptop.yourdomain.com works. So does SSH, HTTP, anything. It’s like having a local DNS that follows your devices wherever they go.
ACLs: Who Can Talk to Whom
By default, every device can talk to every other device. That’s Tailscale’s “flat network” model, and it’s great for most homelabs.
But you might want restrictions. Here’s an example ACL set:
acls:
  # Servers can talk to each other
  - action: accept
    src: ["tag:server"]
    dst: ["tag:server:*"]

  # Clients can talk to servers, but not to each other
  - action: accept
    src: ["tag:client"]
    dst: ["tag:server:*"]

  # Admin can access everything
  - action: accept
    src: ["tag:admin"]
    dst: ["*:*"]

  # Default deny
  - action: deny
    src: ["*"]
    dst: ["*:*"]
Tags are assigned to devices during enrollment:
sudo tailscale up --login-server=https://headscale.yourdomain.com --authkey=KEY --advertise-tags=tag:serverNote: Tag-based ACLs require the Headscale server to approve the tags. You do this in the admin UI or CLI.
I keep my setup simple: everything can talk to everything. My homelab isn’t that big, and the convenience outweighs the marginal security gain.
The Admin UI
Headscale has a web admin interface. It’s basic but functional.
Enable it by adding to your config.yaml:
# Enable experimental features
experimental:
  unix_socket: /var/run/headscale.sock
  # Enable the web interface
  web_interface: true
Then access https://headscale.yourdomain.com/web in your browser. Log in with your Headscale CLI credentials.
From the admin UI you can:
- View all connected devices
- Expire auth keys
- Manage users
- See connection status
It’s not as polished as Tailscale’s dashboard, but it covers the essentials.
Running Headscale Behind a Reverse Proxy
If you already run Traefik or Nginx Proxy Manager (both covered on this blog), you don’t need the Caddy container. Just point your reverse proxy at the Headscale container on port 8080.
Traefik labels:
labels:
  - "traefik.enable=true"
  - "traefik.http.routers.headscale.rule=Host(`headscale.yourdomain.com`)"
  - "traefik.http.routers.headscale.entrypoints=websecure"
  - "traefik.http.routers.headscale.tls.certresolver=letsencrypt"
  - "traefik.http.services.headscale.loadbalancer.server.port=8080"
Make sure to set server_url: https://headscale.yourdomain.com in the config.
What I Learned the Hard Way
1. DNS propagation takes patience
When I first set up Headscale, I changed my DNS records and expected everything to work instantly. It didn’t. Some ISPs cache DNS for hours. My phone, which uses 1.1.1.1, resolved immediately. My home router took 45 minutes.
Set up the DNS records before deploying the containers. Give it time.
2. Auth keys expire — plan for it
I generated an auth key with no expiry for convenience. Then I forgot about it. Months later, I realized anyone who found that key could join my tailnet. Rotate your keys. Use 24h or 7d expiry. Generate new ones when needed.
3. Mobile clients need the official app
The Android and iOS Tailscale apps work with Headscale, but the setup is manual. You can’t scan a QR code like with the standard Tailscale flow. You need to:
- Open the Tailscale app
- Go to Settings → Account → Login with custom server
- Enter your Headscale URL:
https://headscale.yourdomain.com - Paste the auth key from the CLI
It’s a few extra taps, but it works perfectly after that.
4. Don’t run multiple Headscale instances for HA (yet)
I tried setting up two Headscale servers with a shared database for high availability. Big mistake. The database schema isn’t designed for concurrent writes from multiple instances. Stick to one server with good backups.
5. Backups are trivial but critical
Here’s my backup command:
tar -czf headscale-backup-$(date +%Y%m%d).tar.gz ~/headscale/config ~/headscale/dataThat’s it. Restore by:
- Stop Headscale
- Extract the backup
- Restart
Your entire tailnet configuration — users, devices, keys — is preserved.
Headscale vs Netbird vs Traditional WireGuard
I get asked this a lot, so here’s my quick take:
| Feature | Headscale | Netbird | Vanilla WireGuard |
|---|---|---|---|
| Setup complexity | Medium | Medium | High |
| NAT traversal | Automatic | Automatic | Manual (requires public IP + port forwarding) |
| Mesh networking | Yes | Yes | Manual (full mesh = N configs) |
| ACLs | YAML-based | Dashboard | Manual iptables |
| Mobile apps | Official Tailscale app | Official app | Third-party (WireGuard app) |
| Control plane | Self-hosted | Cloud or self-hosted | None (peer-to-peer config) |
| Performance | WireGuard-native | WireGuard-native | WireGuard-native |
Pick Headscale if: You already use Tailscale and want the same experience with your own server.
Pick Netbird if: You prefer a UI-driven setup with built-in SSH and firewall management.
Pick vanilla WireGuard if: You need maximum performance, have static public IPs, and don’t mind managing config files.
I use all three for different purposes. Headscale for my personal mesh. Netbird for a client project that needs a management dashboard. Vanilla WireGuard for a site-to-site link between two fixed servers.
Is This Worth It?
Honestly? For most people, Tailscale’s free tier is enough. You don’t need Headscale. Their cloud is reliable, their product is excellent, and the free plan is generous.
But if you’re the kind of person who reads this blog — someone who wants control, who runs their own servers, who doesn’t trust “the cloud” with their infrastructure metadata — then Headscale is for you.
The peace of mind is real. Knowing that no third-party cloud service is involved in my mesh networking lets me sleep better. And the geek factor of running my own coordination server? That’s a bonus.
Your Next Steps
- Set up Headscale on a VPS or home server using the Docker Compose above
- Enroll your first device and verify connectivity
- Enable MagicDNS and stop typing IP addresses forever
- Set up backups — one command, once a day
- Tell me how it goes. I’m curious what setups you’re running with this.
Related Articles:
- WireGuard VPN Self-Hosted Setup Guide
- Tailscale for Homelab Access
- Netbird Self-Hosted Mesh VPN
- Secure Your VPS: Essential Hardening Guide
Written on July 6, 2026. Running Headscale on a Hetzner CX22, managing 12 devices across 4 locations. Zero issues in 6 months.
Stay in the loop 📬
Get self-hosting tutorials, tool reviews, and infrastructure tips delivered to your inbox. No spam, unsubscribe anytime.
Join 0 self-hosters. Free forever.