Restrict SSH Tunnel Keys to One Private Admin Tool
Restrict SSH tunnel keys with OpenSSH so a private admin tool stays reachable without granting shell access. Includes setup, denial tests, and rollback steps.
An SSH tunnel is a neat way to reach a private dashboard. An unrestricted SSH key is a much less neat way to give someone access to your server. Those are different permissions, and I would not bundle them together just because the connection starts with ssh.
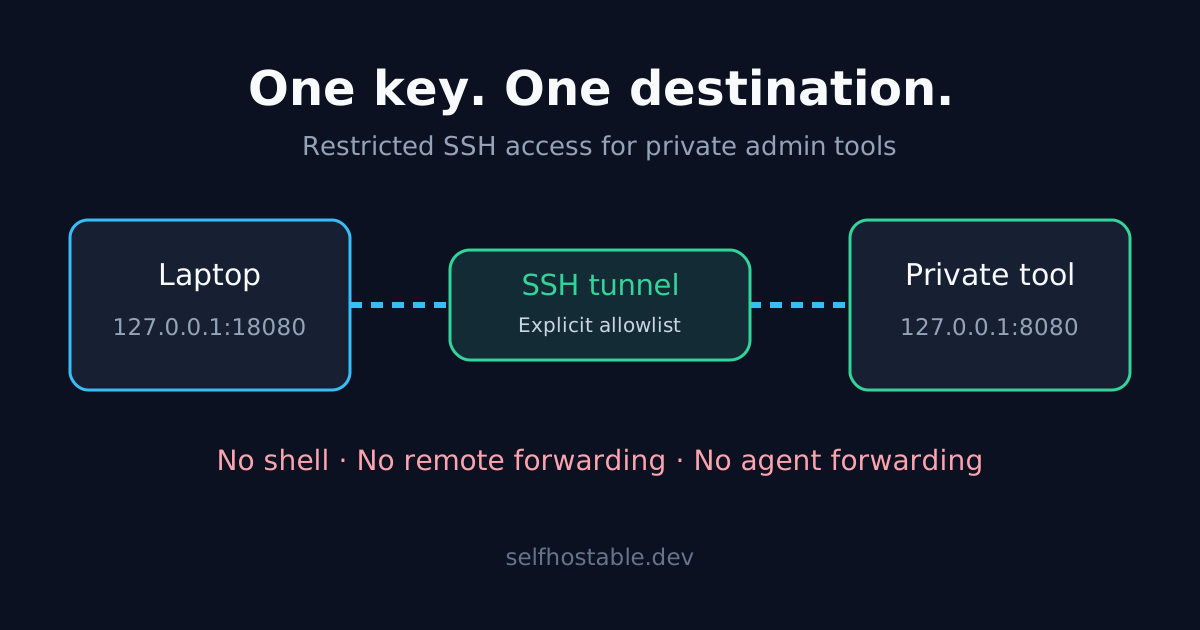
Our Dozzle guide already shows the useful part: bind an admin tool to localhost and forward a port. This tutorial handles the missing boundary: a dedicated account and key that can reach one TCP destination, cannot run commands, and cannot create remote listeners.
TL;DR: use a separate unprivileged account, a restricted public key with one permitopen destination, and an account-level OpenSSH policy. Then test what is denied, not just what loads in your browser.
The problem with a normal tunnel key
Picture a teammate who needs to inspect a dashboard during an incident. You give them your usual tunnel command and add their public key to your deployment account. The dashboard works, but the same key may also run commands, read deployment secrets, and reach unrelated internal services.
That is an illustrative scenario, not a claimed incident from this server. It is also why I prefer narrow credentials over instructions such as “please only use this for the dashboard.” Instructions are not access controls.
We will allow this path:
Laptop 127.0.0.1:18080 -> SSH -> Server 127.0.0.1:8080Change the server-side port to match your tool. This does not make the tool itself safe: a dashboard with container-management privileges can still control containers, and a log viewer can still reveal secrets in logs.
Before you touch SSH
This example targets a Debian or Ubuntu server running OpenSSH, with administrator access and a working private tool on 127.0.0.1:8080. Confirm the tool responds from the server first:
curl --max-time 5 -I http://127.0.0.1:8080An authentication response can be fine. A connection failure needs fixing before SSH enters the picture.
Keep your existing administrator session open. Confirm you have a provider console or another recovery route, and back up any SSH configuration file you edit. We are adding an account, not changing your normal admin key.
Read the installed manuals too:
man sshd
man sshd_config
The authoritative references are the OpenSSH authorized_keys documentation and server configuration manual. Distribution defaults, included configuration files, and existing Match blocks can change the effective policy.
1. Generate a dedicated key on your laptop
Do this on the client, not on the server:
ssh-keygen -t ed25519 \
  -f ~/.ssh/dashboard_tunnel \
  -C dashboard-tunnel
Choose a passphrase when prompted. Only copy the .pub file to the server; the private key stays on the laptop.
I would create one key per person or device. Shared keys turn revocation into a guessing game, and removing one person’s access should not break everyone else’s dashboard.
Verify the server’s host-key fingerprint through a trusted channel when connecting. A narrowly restricted client key does not protect you from accepting an impostor SSH server.
2. Create a separate server account
On the server:
sudo adduser --disabled-password --gecos '' dashboard-tunnel
sudo install -d -m 700 \
  -o dashboard-tunnel -g dashboard-tunnel \
  /home/dashboard-tunnel/.ssh
sudo touch /home/dashboard-tunnel/.ssh/authorized_keys
sudo chown dashboard-tunnel:dashboard-tunnel \
  /home/dashboard-tunnel/.ssh/authorized_keys
sudo chmod 600 /home/dashboard-tunnel/.ssh/authorized_keys
sudoedit /home/dashboard-tunnel/.ssh/authorized_keys
Do not add this account to sudo or docker. Do not give it application secrets or ownership of your deployment directory.
Leave it with the distribution’s normal valid shell for this setup. We will deny session channels with SSH policy; shell replacements and account-locking behavior can interact with PAM and cause authentication surprises.
Paste the following as one line, replacing the example key fields with the complete contents of your actual public key:
restrict,port-forwarding,permitopen="127.0.0.1:8080",command="/usr/bin/false" ssh-ed25519 REPLACE_WITH_YOUR_PUBLIC_KEY_BASE64 dashboard-tunnelThe placeholder is deliberately not a usable credential. Preserve the options, key type, and real base64 key as space-separated fields.
Here is what those options do:
restrictdisables forwarding, agent forwarding, X11 forwarding, PTY allocation, and user SSH startup scripts.port-forwardingselectively enables forwarding again.permitopen="127.0.0.1:8080"limits local-forward destinations to that literal host and port.command="/usr/bin/false"replaces a requested shell, command, or subsystem with a command that fails.
There are two traps here. First, restrict alone does not prohibit every command execution: disabling a PTY is not disabling a shell. Second, permitopen limits local-forward destinations, not remote listeners created with ssh -R.
That is why the account policy matters.
3. Deny remote forwarding and session channels
Find out whether your server includes drop-in files:
sudo /usr/sbin/sshd -T
sudoedit /etc/ssh/sshd_config
Look for an active Include /etc/ssh/sshd_config.d/*.conf directive. Do not assume a directory is loaded merely because it exists.
If that include is active, create a dedicated file:
sudoedit /etc/ssh/sshd_config.d/60-dashboard-tunnel.confUse this content:
Match User dashboard-tunnel
    AuthenticationMethods publickey
    PasswordAuthentication no
    KbdInteractiveAuthentication no
    AllowTcpForwarding local
    AllowStreamLocalForwarding no
    PermitOpen 127.0.0.1:8080
    AllowAgentForwarding no
    X11Forwarding no
    PermitTTY no
    PermitTunnel no
    MaxSessions 0
Match all
If drop-ins are not included, append the block to the end of the main configuration instead, after backing it up. Keep it outside any previous user-specific block.
AllowTcpForwarding local permits client-side TCP forwarding while denying remote TCP forwarding. AllowStreamLocalForwarding no closes the separate Unix-socket forwarding path. MaxSessions 0 denies shell, command, and subsystem sessions while still permitting forwarding.
The final Match all returns to an all-connections match context; it is not a substitute for checking how your other included files are structured. Do not blindly rearrange existing SSH configuration to fit this example.
Validate before reloading:
sudo /usr/sbin/sshd -t
sudo /usr/sbin/sshd -T \
  -C user=dashboard-tunnel,host=laptop.example,addr=192.0.2.10
Substitute the real client address and relevant connection criteria if your policy uses them. In the effective output, check allowtcpforwarding local, allowstreamlocalforwarding no, permitopen 127.0.0.1:8080, and maxsessions 0.
Only after validation succeeds:
sudo systemctl reload sshSome distributions name the service sshd; use that unit if appropriate. Open a fresh admin connection before closing the old one. A successful syntax check cannot prove your administrator still has access.
4. Open the allowed tunnel
On your laptop:
ssh -N -T \
  -i ~/.ssh/dashboard_tunnel \
  -o IdentitiesOnly=yes \
  -o ExitOnForwardFailure=yes \
  -L 127.0.0.1:18080:127.0.0.1:8080 \
  [email protected]
Open http://127.0.0.1:18080 in your browser. Keep the SSH process running while you use the dashboard.
-N requests no remote command, and -T requests no terminal. The explicit client-side loopback address avoids exposing your forwarded port to other machines on the laptop’s network.
Keep application authentication enabled. Anyone who can connect to that local listener may reach the forwarded tool; SSH does not distinguish your browser from another local process.
5. Prove the restrictions work
A security tutorial that stops at a working dashboard has only tested the happy path. We also need failure checks.
First try a remote command with the dedicated key:
ssh -T -i ~/.ssh/dashboard_tunnel \
  -o IdentitiesOnly=yes \
  [email protected] id
It must not print account details or execute id. With MaxSessions 0, the session channel should be rejected.
Next try another destination:
ssh -N -T -i ~/.ssh/dashboard_tunnel \
  -o IdentitiesOnly=yes \
  -L 127.0.0.1:18081:127.0.0.1:22 \
  [email protected]
In a second terminal, actually connect to it:
nc -v 127.0.0.1 18081The SSH client should report a prohibited channel, and you must not receive the server’s SSH banner. Stop the test tunnel afterward.
This distinction matters: a local listener can be created even when its eventual destination is forbidden. ExitOnForwardFailure does not guarantee that every connection through a local forward will succeed.
Finally test remote forwarding:
ssh -N -T -i ~/.ssh/dashboard_tunnel \
  -o IdentitiesOnly=yes \
  -o ExitOnForwardFailure=yes \
  -R 127.0.0.1:19090:127.0.0.1:8080 \
  [email protected]
The remote-forward request must fail. If any denial test succeeds instead, stop sharing the key and inspect the effective account policy before continuing.
These are acceptance tests for your server, not a claim that this article changed or tested your production SSH service.
Troubleshooting without weakening the policy
The permitted tunnel connects but the dashboard does not load. Check the application locally on the server. Use exactly 127.0.0.1:8080 in the tunnel destination; localhost:8080 is not the same literal destination for permitopen matching.
Authentication fails. Check key contents, ownership, permissions, account eligibility, AllowUsers rules, and server logs. Do not fix a typo by disabling StrictModes or opening password login.
Forwarding is still prohibited. A global DisableForwarding yes or another matching policy can deny it. The key’s port-forwarding option cannot override the server’s restrictions.
The tool is an HTTPS endpoint. The tunnel carries TCP, not certificate identities. Preserve correct hostname verification using a suitable hostname and certificate; do not normalize clicking through TLS warnings.
You need several destinations. Add explicit destinations to both the server policy and key options, then repeat the denial tests. Once the list becomes a small network, consider WireGuard instead of maintaining a maze of forwards.
Revocation, rollback, and the VPN distinction
Remove a device’s public-key line to stop new connections. Already authenticated tunnels can remain alive; terminate the account’s active SSH connections when immediate revocation is required, checking processes carefully before killing anything.
For rollback, remove the dedicated match block or drop-in, run sshd -t, and reload the correct SSH service. Removing restrictions while leaving the account and its keys in place can broaden access, so revoke the keys as part of retiring this setup.
SSH keys, SSH certificates, and VPNs solve different pieces of the problem. Certificates help manage identity and expiration; these rules limit what an authenticated connection can do.
A commercial VPN is a separate option for outbound privacy on an untrusted network. It does not replace this private access policy, application authentication, or server hardening.
🚀NordVPN
An option for outbound privacy on untrusted networks, not a replacement for restricted SSH access to your server.
Affiliate link — we may earn a commission at no extra cost to you.
Your next step: pick one localhost-only tool, create a dedicated key, and record three results: the tool works, another destination fails, and remote forwarding fails. That is a much better access policy than handing out a deployment key and hoping everyone stays polite.
Stay in the loop 📬
Get self-hosting tutorials, tool reviews, and infrastructure tips delivered to your inbox. No spam, unsubscribe anytime.
Join 0 self-hosters. Free forever.